Powered By Blogger

Sunday, December 30, 2012

Homemade Crunchwrap Recipe

My guilty pleasure is Taco Bell, something my husband and I have in common. Homemade tacos are divine but such delicacies as the Mexican Pizza and The Chalupa can't be denied. We rarely indulge in this massacre of traditional foods. Tonight my husband wanted to indulge. He said he wanted a crunchwrap. As soon as he said it, I couldn't agree more. Crunchwraps are pretty fantastic.

I decided we couldn't go out... we're broke until Friday. So my solution was to make homemade crunchwraps. I had ground chuck, burrito shells, lettuce, black olives, refried beans, queso dip and onions. But what about the flat crispy shell that puts the crunch in crunchwrap? I ended up using hard taco shells split in half.

Fry up your meat like you would for tacos, along with half a cup of diced onions. I then ran my meat through my ninja chopper, to create an even texture and to mimic taco bell even better.

Spread a thin layer of refried beans onto a tortilla, creating about a four inch circle. Top with your meat, queso cheese, them your halved hard taco shell. Then spread on a layer of sour cream, your black olives (we used the pre chopped) and lettuce.

Folding the crunchwraps was easier than I expected. Simply fold one side in and continue folding over in a circular motion. You'll end up with a hexagon.

Flip your freshly folded crunchwraps over and let them rest for a minute. Now they wont try to unfold on you! Spray your pan or griddle with non stick cooking spray and allow them to cook over medium heat for four minutes on each side.

What you have now is a fantastic homemade crunchwrap. I hope you enjoy these copycat crunchwraps as much as my family did! Another great dish from my kitchen to your table!

Tuesday, December 11, 2012

Creamy Crunchy Crab Cakes

My husband loves seafood. Shrimp, crab, lobster, crawfish, clams, you name it. Chances are if its swimming around in the ocean, he wants to eat it. One of the saddest days for him was when our daughter was diagnosed with a shellfish allergy, and a whitefish allergy. Well two months ago she went for a follow up appointment to get her epi pen prescription re filled. We've never had to use one (thank goodness! ) but they do expire after a while. While we were there her doctor decided to test her again, and my daughter came back allergy free. The look on my husband's face after being told our daughter had outgrown her allergies was priceless. We had fish for dinner that very night.

He occasionally asks me for things that surprise me. We had a package of imitation crab meat sitting in the freezer, awaiting inspiration to strike me when he asked me if I could make crab cakes out of it. I said sure why not? Then instantly regretted it. I had never made crab cakes before, and had nothing any of the recipes I found online called for except crab and onion. So what did I do?

Got creative of course! I said I would make crab cakes so I would, even if I had to stretch the definition of crab cake a little bit. So I rummaged through my cupboards and fridge and came up with:

1 package imitation crab meat, chopped
1 eight oz brick of cream cheese, warmed in the microwave for 60 seconds
10 green onions, chopped
1 egg
1/2 a teaspoon old bay seasoning
2 cups puffed rice cereal, separated

Mix the first five ingredients with 1 cup of puffed rice. Let your mixture set in the refrigerator for five minutes. Scoop out a tablespoon at a time and press into the remaining puffed rice, to coat. This is a messy procedure so if you don't want dirty hands, wear some food safe gloves. Drop your cakes into 375° oil and fry until golden brown, about two minutes on each side. Drain off excess grease and enjoy with some Tartar sauce or cocktail sauce. Both only require three ingredients.

TARTAR SAUCE

1cup Mayo
2 tablespoons sweet relish
1/2 teaspoon lemon juice

Mix all ingredients well.

COCKTAIL SAUCE

1 cup ketchup
2 tablespoons grated horseradish
1/2 cup lemon juice

Mix all ingredients well.

And there you have it! Another easy and delicious dish from my kitchen to your table!

Monday, November 26, 2012

Creamy BBQ Chicken Pinwheels

These delicious appetizers make a very rich satisfying snack. My husband adores them and I was pretty pleased with how they turned out.

I chopped half a pound of cooked chicken breast into small cubes and set them aside.

I put 4 oz of cream cheese in the microwave for one minute. Then I added three tablespoons of my favorite BBQ sauce and mixed well.

Then I diced up ten green onions and shredded about two cups of cheddar cheese.

Spread the BBQ cream cheese onto a large wrap. I used an actual pinwheel wrap but that's not necessary. Then sprinkle the remaining ingredients on top. I found that I had enough cream cheese for two wraps, so I made two. If your wraps are smaller you may need three. Carefully roll up your wrap and bake for ten minutes at 400°. With a very sharp knife, cut into slices. Enjoy warm or cold, I prefer warm. There you have it. Another great dish from my kitchen to your table.

Friday, November 23, 2012

Picture Perfect Ham

I bought a shank ham for Thanksgiving this year, with big plans for the leftovers. That doesn't mean I didn't dedicate my day to making this thing amazing the first time around!

Like most hams one buys at the Mega Mart, my ham was full cooked, with water added. The big beautiful bone in the middle helped maintain moisture all the while, even as a certain beagle sighed longingly, knowing it would soon be his. I don't use the bone to make soup, but by all means, you can. It adds great depth and unmistakable flavor to bean soup, and a more tasty addition to bean soup has yet to be discovered.

I started out simple. I opened a can of pineapple and drained all the juice into the bottom of the electric roaster, before lowering in my cold ham. I put the lid on and let him cook for an hour, undisturbed, at 350°.

At fifteen minutes to the hour mark, I pureed half the can of pineapple and mixed it with half a cup of marischino cherry liquid, a half of a cup of brown sugar and two tablespoons of honey. I brought this liquid to a simmer, careful to continuously stir so nothing scorched.

With this, I glazed my entire ham. Then I used toothpicks to secure marischino cherries and pineapple slices to the outside of the ham.

I lowered the heat to 300° and re glazed him every hour for three more hours. Then I glazed him one more time and turned off the heat. The results were a moist, flavorful ham, with a beautiful contrast of sweet and salty.

I recommend everyone prepares a holiday ham in a similar fashion. This meat is as versatile as it is delicious. You can make omelettes, breakfast sandwiches, hot ham sandwiches, ham and cheesy mac, scalloped potatoes, cheesy ham and hashbrowns, eggs Benedict. The sky is the limit!

So there you have it, another great dish from my kitchen to your table!

Sweet Potato Turnovers

Amongst all the fantastic food on Thanksgiving, I made a special dish to try to get my husband and daughter to eat sweet potatoes. They both wrinkle their noses at the sight of them, so I hid them away. But believe me, they are definitely the star of this dish!

I diced up a large sweet potato into small cubes. Then I tossed it with seven strips of Bacon, chopped up small, a quarter cup diced scallions and two heaping tablespoons of butter. Then I roasted them at 300° for an hour. Then I let them cool completely before stirring in 4oz shredded cheddar cheese.

I used premade biscuits to save time, but homemade would be FANTASTIC in this dish. I rolled each biscuit as thin as possible before placing a small chunk of butter on one part of the disc, then piled on a liberal tablespoon of sweet potato filling before folding the other side over and pinching to seal. Bake at 375° until golden brown and delicious.

And there you have it! Another great dish from my kitchen to your table!

Wednesday, October 31, 2012

Halloween Dinner

Halloween dinner was very fun this year. Instead of rushing it, then bolting out the door before she rubbed the face paint off, we sat down and made a fun easy meal.
On the menu tonight was Mummy Dogs and Jack O Lantern Empanadas. Both of which were cute and delicious.
Mummy Dogs are as easy as can be. Take a package of hot dogs and cut it open, bam, your base is complete. The next step is to open up a tube of refrigerated biscuits, I uses the flaky layers kind. Split each raw biscuit in half and flatten each half down. Cut thin strips of the biscuit. Wrap these strips around your hot dogs, leaving a very small gap between each strip, and a half inch near the top of your hot dog to put his face. Bake in a 350° oven for ten minutes or until golden. Dab on mustard "eyes" and a mustard "mouth" with a toothpick.
The empanadas are just as easy. Take a refrigerated pie crust and unroll it. You could always make your own too, of course. Using a cookie cutter, cut out your desired shape. Since its Halloween, I chose pumpkins. Your crust is ready for the filling.
The filling is very simple. Cube up a large potato extra small. I used my automatic dicer. Microwave your potatoes for six minutes. To your hot potatoes add 4oz cream cheese and a cup of cheddar cheese. Mix well before scooping a tablespoon of your potato mixture onto one of your crust cut outs. Top with another cut out, sealing the edges by pinching them.
After you have all your empanadas stuffed, its time for the faces. Using the scrap dough from the cut outs, cut out little eyes, mouths and noses for your Jack O Lanterns. Simply press these one, gently.
After your faces are in place, scramble one egg and brush onto the tops of each empanada. Bake them in a 400° oven for 13 minutes or until crispy and golden brown. There you have it! I hope you enjoyed these nice little tricks to getting some great treats from my kitchen to your table!

Thursday, October 25, 2012

Halloween Cheeseball

My little guy is made out of cream cheese, diced ham, green onions, Cheddar cheese and yellow bell pepper for the eyes and mouth. His stem is a broccoli stem, so he's 100% edible and spookily delicious!

Just mix all your ingredients except the cheddar cheese, yellow bell pepper and broccoli stem in a large bowl. Once thoroughly mixed, shape into a ball. Your hands will get dirty so if youre against it, wear some food grade latex gloves.

After you have a ball, roll it in shredded cheddar cheese. Now he's orange. Add your face and stem, then Voila, you have a great snack from my kitchen to your table.

Friday, October 19, 2012

Delicious Deviled Eggs

Deviled Eggs are easily the most recognizable of the pot luck standards. Who hasn't had a mouthwatering deviled egg while maneuvering through a table full of potato chips and store bought salads? Simple, tasty and easy to make, deviled eggs are one one of the most beloved appetizers out there.

Boil twelve eggs. I get my water going at a rolling boil before lowering my eggs in gently. I buy my eggs a week or two ahead of time, because older eggs are easier to peel. Boil for ten minutes. No more, no less. Take them out of the boiling water immediately, and put them in a strainer. Run them under cold water to make them bearable to the touch and peel them as quickly as possible. The trick is to crack each end and find where the air pocket was.

Then all you have to do is cut each egg straight down the middle lengthwise. I use a straight edged paring knife. Once you have the eggs halved, you can move on to a more delicate process of GENTLY removing the yolks from the white with a spoon.

Place all your whites on your serving plate and all your yolks into a bowl. Before adding any of your mix ins, crumble the yolks with a fork. You will have fluffy yolk crumbs. I add three healthy tablespoons of miracle whip, a tablespoon of sweet relish and a teaspoon of mustard. Mix well. You should have a nice creamy filling.

Scoop your filling into the cavity on each white, careful to distributed the filling as evenly as possible between the whites. Top each deviled egg with pepper or paprika or even leave it as is. Now you have a fine batch of traditional deviled eggs.

Traditional not your style? That's okay because there's very little you can't stuff an egg with. Want a heartier deviled egg? Prepare the traditional eggs and add finely chopped Bacon and very small chunks of potato. Want something a little zippier? Prepare the traditional eggs, omitting the relish for finely diced jalapenos and shredded cheese. Want to try something truly unique? Prepare the traditional eggs, and mix in some cream cheese, finely minced green onions and very finely chopped ham. With so many ways to make deviled eggs your own specialty, why aren't you making them right now?! Another great dish from my kitchen to your table.

Thursday, October 11, 2012

BBQ Nachos

One of my daughters favorite snacks happens to be a great way to utilize leftovers. Today I used leftover pulled pork, but you can always use any barbacued meat, or even leftover sloppy Joe meat.
Slice three medium russet potatoes very thin. Sprinkle with olive oil and mesquite seasoning. Bake in the oven at 400° for about twelve minutes.

Spread your homemade chips out on a plate evenly. While they're still warm, sprinkle shredded cheese as evenly as possible over top of them.

Reheat your barbacued meat in the microwave before spreading on top of your chips. Then top with more BBQ sauce. Voila. A delicious snack from my kitchen to your table.

Monday, October 1, 2012

Italian Loaf Dinner

This dinner is as easy as it gets, and one of my family's favorites. At our local grocery store we can buy beautiful loaves of Italian bread for a dollar, and garlic bread spread (margarine, heavily flavored with Italian seasonings and garlic) for three dollars, all on the same display. I often indulge in this sale, because the loaves can be frozen and used at a later date.

Tonight I thawed out a loaf of Italian bread and split it down the middle horizontally. I had a top and a bottom, so with the top, I spread pizza sauce, pepperoni, cheese and black olives.

On the bottom I spread the garlic bread spread and topped with shredded cheese and parmesan cheese.

I placed both halves on a baking sheet into the oven. I preheated the oven to 425° because my family enjoys crispy pizza and bread. 400° would work just as nicely. After about twelve minutes in the oven I had a super quick, super fun and super easy meal from my kitchen to your table.

Wednesday, September 26, 2012

Chicken Enchilada Pizza

This dish was my invention to simply indulge my daughters whimsical request. I asked her if she wanted pizza or tacos for dinner and she said chicken. I said I can make chicken tacos. She requested chicken taco pizza. So this is my response.

I made a quick 5 minute pizza crust. You could always use store bought or your own recipe. Then I spread some refried beans on the crust.

I cooked my chicken in the oven for five hours at 275°. Before they went into the oven I filled the baking dish they were in with chicken broth. Then I sprinkled the chicken liberally with taco seasoning.

For the sauce, I mixed a can of Cheddar cheese sauce, a can of enchilada sauce and five tablespoons of sour cream. Spread the sauce as evenly as possible before sprinkling your shredded chicken on. I also diced up some onions to throw on there. Then I topped it with taco blend cheese.

Bake your pizza at 400° for twenty five minutes. Feel free to top with anything you'd top enchiladas with. Tomatoes, lettuce, black olives, whatever you like. Another great meal from my kitchen to your table!

Easiest Casadillas Ever

This is a great snack that can be easily turned into a meal with the right fixings. This is also an incredibly simple dish to make. Mix three large cans of chicken breast with a quarter cup of salsa, three tablespoons of taco seasoning, and one and a half cups of shredded cheddar cheese. Mix it all together. Scoop a generous portion of your chicken mixture onto a flour tortilla. These freeze very well, all you have to do is lay a piece of wax paper between each casadilla. Just heat them up in the oven, they'll crisp up nicely, then top them with any condiments you choose. Another great freezer meal from my kitchen to your table!

Mini Pizza Bagels

By far the favorite of the frreezer dishes in my household, pizza bagels are super easy to make, all you need is a bag of mini bagels, a jar of pizza sauce, some mozzarella cheese and some pepperoni. This dish is the easiest I'm going to give you. But I'm here to inform you how well these freeze. I made dozens of these and froze them so my husband has a snack whenever he likes. Much much much cheaper to make your own than buy the store bought. And so much better tasting! Enjoy the delicious snack and the knowledge your family is eating a healthier homemade version of a beloved snack. From my kitchen to your table!

Thursday, September 20, 2012

Freezer Cooking

I'm going to try my hand at something I have never done before, and I'm really looking forward to it! This Saturday my friend and I are going to bust our butts all day to prepare at least twenty meals each! Our combined efforts will create some fantastic freezer foods! What are freezer foods? To A busy mom (me!) and a super busy college student (her!) its a dream come true! You prepare all sorts of dishes, let them cool, package them up nicely and freeze them for another day. In fact, the dishes we plan to make are all precooked, do they can go straight from the freezer to the oven or microwave! Here's a list of what we will be making!

Beef Meatballs
Chicken Casadillas
Taco Beef
Shredded Chicken
Pizza Bagels
Pizza Biscuits
Ground Beef Starter
Whole Seasoned Chicken Breasts
Waffles
Lasagna

For the next few days I will be posting different pictures and explanations of how they went from my fridge to freezer. Happy Cooking!

Butterless Scalloped Potatoes

Tomorrow is pay day, so that means grocery day! Yay! But that also means we are low on food today. But as the thrifty cook knows there is ALWAYS something to make, as long as you're willing to be creative. Today I decided to make scalloped potatoes before I realized I was out of butter. But don't you fret! My creative brain realized that the butter was only the fat that bound my thickener. So why not use a different fat? Oils wouldn't work in this particular dish, but guess what works beautifullly as a fat? Well, fat. Or to be more precise, pig fat, in the form of Bacon grease. I actually save my Bacon grease but you can always make some fresh by frying up some Bacon, you could even add the Bacon to this dish!

In a saucepan add three tablespoons and turn it onto medium heat. Add three tablespoons of all purpose flour to the grease and mix thoroughly. Let this cook for 60 seconds before adding one and a half cups of milk. Bring this mixture to boil, stirring occasionally. Once you have reached boiling, turn your heat to low and add one cup of shredded cheese. I used Colby Jack but you can use whatever you like, as long as its a good melting cheese.

Now that your sauce is complete you should slice up your taters. I use whatever I have on hand. Today I used good ol fashioned white potatoes. My potatoes were cut by hand, but I aimed for about an eighth of an inch thick. You could always use an electric slicer or a mandolin but its not necessary. I had about two and a half cups of sliced potatoes when I was done.

I used some non stick cooking spray before I made my first layer of potatoes. I had four layers, and spread my sauce between each layer, and of course, on top of the final layer.

I went into my cupboard and realized sadly I was out of bread crumbs. Of course you don't have to have a crunchy topping, but I like to. So I crushed up Cheerios with salt pepper and garlic. Sprinkle them right on top. Bake in the oven for about an hour at 300°. And there you have it! A great side dish from my kitchen to your table!

Tuesday, September 4, 2012

Meatloaf Layer Bake

I really couldn't think of a better name for this concoction my husband came up with. He isn't a fan of Shepard's Pie ( he's a strange man) so when he groaned about it when I said that's what was for dinner, I challenged him to come up with a better idea that involved the same ingredients. So he came up with this, and I was pleasantly surprised at how well it turned out. You start off with one pound of ground chuck. Mix in an egg, your seasonings of choice, a cup of rolled oats, a quarter cup of minced onion and half a cup of shredded cheese. I added some feta cheese but that's optional. Place this meat mixture in the bottom of your glass baking dish. I used a small Pyrex dish, but you could always use a loaf pan.

mashed four potatoes with some butter and milk, and a sprinkling of salt, pepper and garlic. The next step was the easiest. My mother in law made freezer corn and gave us some. I thawed it out and opened the container. Bam. Corn. :)
I baked the meat loaf for about twenty minutes before taking it out of the oven to spread the mashed potatoes on top of it. On top of the mashed potatoes I spread the corn. On top of the corn I sprinkled some shredded Cheddar cheese.

Bake this dish for another 25 minutes at 350°. Don't forget to let it settle for 15 minutes so any juices can be re absorbed into the meatloaf and mashed potatoes.

erve with a nice biscuit or roll. There you have it! A fun twist on meatloaf, that's easy and fun to make. From my kitchen to your table!

Monday, September 3, 2012

Sausage Gravy and Biscuits

My family loves sausage gravy and biscuits more than most breakfast foods but we eat it for dinner instead of for breakfast. Its a simple meal to make, especially if you use premade biscuits like I do.

To make the gravy you have to start by frying a pound of pork sausage. I use regular old fashioned breakfast sausage. Brown and crumble thoroughly.

Separate the sausage from the grease but don't discard the grease. Leave the grease in the pan and add flour until you get a nice golden colored paste. This is your roux.

Add milk to your Roux and whisk until you have the thickness you want. Don't be afraid to add more milk as needed. Add your cooked sausage and stir in a teaspoon of crushed red pepper flakes.

Serve your delicious gravy over biscuits. I buy frozen southern style biscuits, but you could always use your own recipe or any other premade biscuits. And there you have it! Another great meal from my kitchen to your table!

Saturday, September 1, 2012

Easy Cheesy Enchiladas

Tonight I made a tasty simple dinner my whole family loves! Enchiladas are so easy, this is a great opportunity to get the whole family involved in the process. My daughter sprinkled cheese and my husband browned the ground chuck.

I make my own creamy enchilada sauce out of a quarter cup of taco sauce, two cups of sour cream, a cup of chicken broth and 8oz of cheddar cheese and a tablespoon of taco seasoning.

This dish is not only easy to make, it has some very basic ingredients. Flour tortillas, ground chuck, cheese, taco seasoning, enchilada sauce, refried beans and assorted toppings are all you need.

My husband browned the ground chuck a little before adding the taco seasoning. He continued to brown and seperate the meat until it was cooked thoroughly.

To the meat I added a can of refried beans. I only used one pound of ground chuck, but I  suggest one can of refried beans per pound of meat, so if you brown two pounds of meat, add two cans of refried beans. Remember, the ground chuck can be replaced with any ground meat. Turkey, chicken, pork, venison, whatever you have on hand. Then add an entire 8oz bag of shredded cheese! I did say easy CHEESY enchiladas!

Take each tortilla and spread a liberal amount of the meat mixture to the center of the tortilla. I used a regular 8" tortilla so my final roll was cut in half. If you buy small tortillas that step wont be necessary. After your meat mixture is on the tortilla, roll the tortilla around the meat mixture until you have a nice thick roll.

Place your well formed rolls into a glass baking dish. Pour your enchilada sauce overtop your enchiladas. Add a generous sprinkling of cheese on top of the sauce and bake for 20 minutes at 350°

Once your enchiladas are baked all you have to do is top them with your favorite veggies and condiments. We top ours with lettuce, onions, black olives, sour cream and more cheese!

So there you have it! An easy and satisfying meal the whole family can help make and enjoy! From my kitchen to your table!

Thursday, August 16, 2012

French Toast Bake

This dish was more of a Throw What-We-Have-Together-And-Hope-It-Tastes-Good kind of meal. We are running low on everything, and these ingredients went from being your basic breakfast for dinner to a nice casserole all because of my dislike of the smell of burnt toast.

I looked in my cupboard and realized I had half a loaf of unsliced French bread, and that's it. French bread gets pretty crumbly, especially as toast. All those crumbs fall to the bottom of my toaster and burn and stink. So plan B was to cube up the bread.

In a large mixing bowl, I whisked four eggs, cinnamon, a splash of vanilla and some milk. Then I placed all the bread cubes in the egg mixture and coated them well, letting them rest a little bit to make sure they soak up the egg mixture.

While the bread is soaking, fry up ten sausage links. Slice them up and add them to the now coated bread cubes.

Layer the mixture into a greased casserole dish and top with a half a cup of maple syrup. Bake at 350° for 25 minutes. Scoop out and top with more maple syrup. Enjoy this economical and delicious meal from my kitchen to your table!

Saturday, August 11, 2012

Pork Parmasean Bake

Another Fresh Take recipe! This time I decided I wanted to try my take on a meal I grew up eating. With the help of my best friend, some very simple ingredients and memories of my childhood's chicken parm, we managed to create a fast, delicious dinner.

I simply sliced some boneless center cut pork chops into one inch strips. I coated them with a rosemary and garlic fresh take before baking them at 350° for half an hour.

While the pork cooked, I set a pot of spaghetti to boil. When the noodles were almost done, I strained the water from them. I put them back in the pot and added a tablespoon or so of butter, and some Italian seasoning.

Layer the noodles along the bottom of a glass casserole dish. Top with shredded cheese of your choice. We used Monterey jack.

Layer the cooked pork cutlets over the cheese. Top with more shredded cheese.

Spread a jar of spaghetti sauce over the pork and cheese as evenly as possible. Top it all off with some Italian bread crumbs.

Place your pork parmasean into the oven and cook for twenty minutes on 400°.

Here's my take on a great staple of my childhood. Its a little bit different than a lot of people are used to but I assure you it is no less mouthwatering. A fun easy dish from my kitchen to your table!

Saturday, August 4, 2012

Yummy Lasagna

Tonight my fiance made dinner and I am so proud of him! His first lasagna! And he did a great job. He also experimented and it turned out great. Instead of ricotta cheese he used a Philadelphia Cooking Creme. While I can't say this was an intentional mistake (he eats ricotta, but doesn't know what it looks like. I got asked where that stuff i smear on the noodles was. My awesome description of "Its on the second shelf!" confused him I guess.) it turned out to be a tasty mistake.

He boiled the noodles in a large pot of water. He also doesn't listen to the back of the box. Once they were almost done I had him drain them. As I kindly reminded him, the noodles will finish cooking in the oven when the lasagna bakes.

He lay his noodles into the bottom of a glass baking dish. He trimmed about an inch off the ends so they lay flat. Then he spread the cooking creme onto the noodles.

While he prepared his noodles, I browned his ground chuck for him. I seasoned it with oregano, Basil and garlic. Then he promptly shooed me out of the kitchen.

He drained the grease from the meat, and added a jar of spaghetti sauce to it. He also added honey, which I have never done. He couldn't find the sugar. I'm pleased to say that honey will be a part of my lasagna recipe from now on.

He spread the meat mixture on top of the cooking creme, liberally. He then sprinkled a generous portion of Cheddar and mozzarella cheeses on top of the meat.

He repeated the layering process three times and placed his creation into our oven, which had been preheated to a toasty 350°.

After forty minutes in the oven, his first ever lasagna was complete, and it was fantastic.

Was it fancy? Not even close. But he did go into that kitchen determined to make dinner and he succeeded. It certainly wasn't traditional, but I really cannot stress enough that cooking is something you should take the time to enjoy. He experimented, guesstimated and flat out threw ingredients together. But he had fun and was so proud. Take joy in your cooking and always be adventerous. And as always, have fun and cook with your kids. Here's another great meal from my kitchen to your table!

Chili Cheese Tater Tot Casserole

This dish is how I use up leftover chili. For some reason I always make enough chili to feed an army. But just in case you don't have any leftover chili sitting in your fridge or freezer, I'll give you my recipe.

In a large pot brown a pound of ground chuck. Drain the grease off the meat, using your metal strainer. Put the meat back in the large pot and add one can of chili beans, one can of kidney beans, one can of Ro Tel and one large can of diced tomatoes to your meat, ALL undrained. Add a chili seasoning packet (I use French's Chili with Onion) or chili powder to taste. Bring your chili to a boil, then take the heat down to a simmer for about half an hour.

Now on to the casserole! Spray a large casserole dish with non stick spray. Put the tater tots into the casseroles dish. I used about 3/4 of a bag but it really depends on how big your pan is. Mine is 5x9x2.

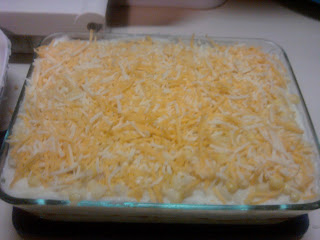
Once you have a nice layer of tater tots, pour your chili over them. Don't saturate them, but make sure you have enough. I used about two and a half cups. Then sprinkle about 8 oz of shredded Cheddar cheese on top. Bake on 350° for about 45 minutes. There you have it! A quick and easy lunch anyone can make. A fun meal from my kitchen to your table!